

Stable Diffusion produces digital images from natural language. These models create images by gradually adding noise made up of tiny spots and dots. Once a clear image is obtained, the model removes noise and then produces an image matching the natural language.
There have been claims of customers having trouble running Stable Diffusion on the GPU of M1 Macs. Therefore, if you are one of those confronting these difficulties, the solution is right here. Continue reading to find out how to run stable diffusion on the GPU system of your M1 Mac.
What You Should Know Before Running Stable Diffusion on M1 Mac’s GPU
You should be aware that stable diffusion is open source before getting ready to install this model on the GPU of your M1 Mac. Users can either run Stable Diffusion online. But if your computer has an impressive graphics card and you know how to set it up, you can download and run the model on your computer.
However, getting it to run on the GPU of an M1 Mac is a little tricky. So let's look at how to run stable diffusion on the GPU of your M1 Mac.
First, ensure your mac falls in the following category.
- Your Mac comes with an M1 or M2 chip.
- Your MAC OS must be up to 12.3 or higher.
- A minimum of 8GB Ram but 16GB RAM and above is preferable.
- Ensure you install Python 3.10 above.
Note: Use pip instead of Conda to install dependencies since it's much easier to set up and does not necessitate you to compile anything because it uses binary wheels.
Getting Started With Stable Diffusion on M1 Mac’s GPU
Step One: Check to see if your version of Python meets the requirements
Run python -V to check the version of Python on your M1. If it is 3.10 or higher, move on to the next step. If it is not, install or upgrade to Python 3.10. Homebrew is the simplest method for accomplishing it. Install Homebrew, then install Python.
brew updatebrew install pythonStep Two: Clone the repository and install the necessary dependencies.
To clone the fork of Stable Diffusion, run the following code on your M1:
git clone -b apple-silicon-mps-support https://github.com/bfirsh/stable-diffusion.git
cd stable-diffusionmkdir -p models/ldm/stable-diffusion-v1/Step Three: Set up a Virtualenv to Install the Dependencies
Firstly, install the following:
python3 -m pip install virtualenv
python3 -m virtualenv venv
Once the installation is complete, activate the virtualenv by running this code
source venv/bin/activateNote: Ensure you run this command any time you want to run Stable Diffusion.
Install the dependencies.
pip install -r requirements.txtOnce more, if you experience Failed constructing wheel for onnx errors, you might need to install these packages.
brew install Cmake protobuf rustStep Four: Download the .ckpt files
Visit the Hugging Face repository, read the license, and then select "Access repository."
Save the sd-v1-4.ckpt file (around 4 GB) as models/ldm/stable-diffusion-v1/model.ckpt in the directory you created earlier.
Step Five: Run it!
Now, you can run your first stable diffusion code on your M1.

Try out these examples.
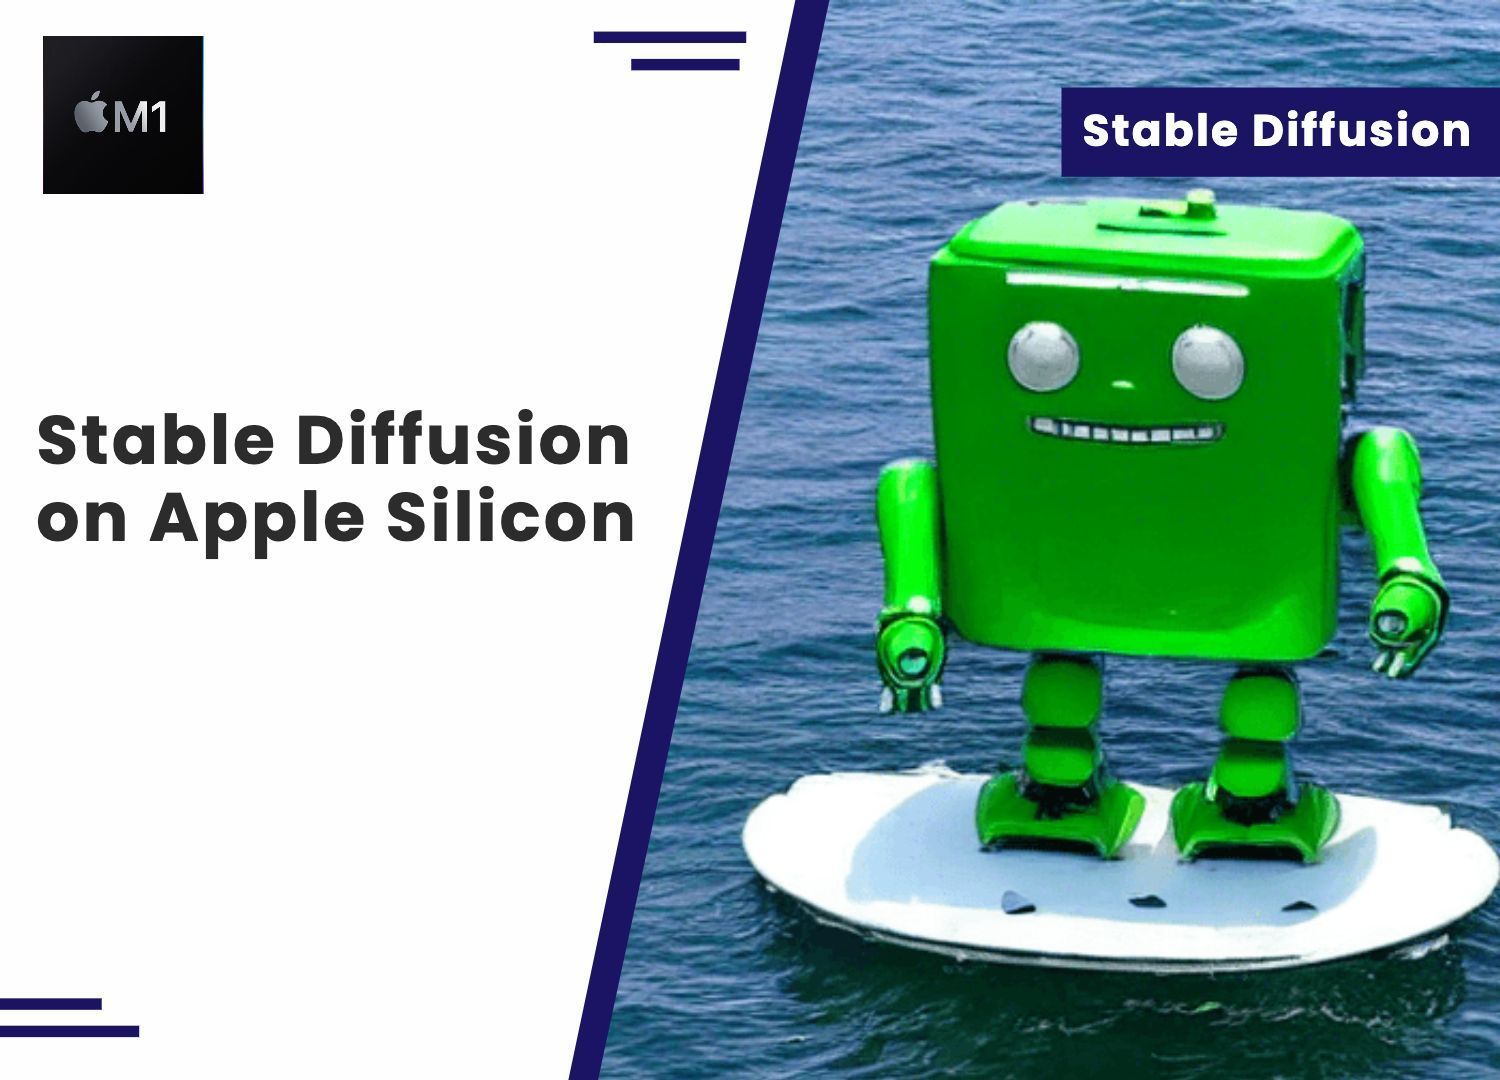
python scripts/txt2img.py \
  --prompt "a green robot on a boat in the sea" \
  --n_samples 1 --n_iter 1 --plms
python scripts/txt2img.py --n_samples 1 --n_iter 1 --plms --prompt "Super realistic robot that looks like a human. Hyper Detail, 8K, HD, Octane Rendering, Unreal Engine, V-Ray, full hd"Conclusion
Stable diffusion projects are evolving quickly, so some of these solutions could become obsolete as the package is still being modified.